Wednesday, April 3, 2019

March Vintage Pattern Project

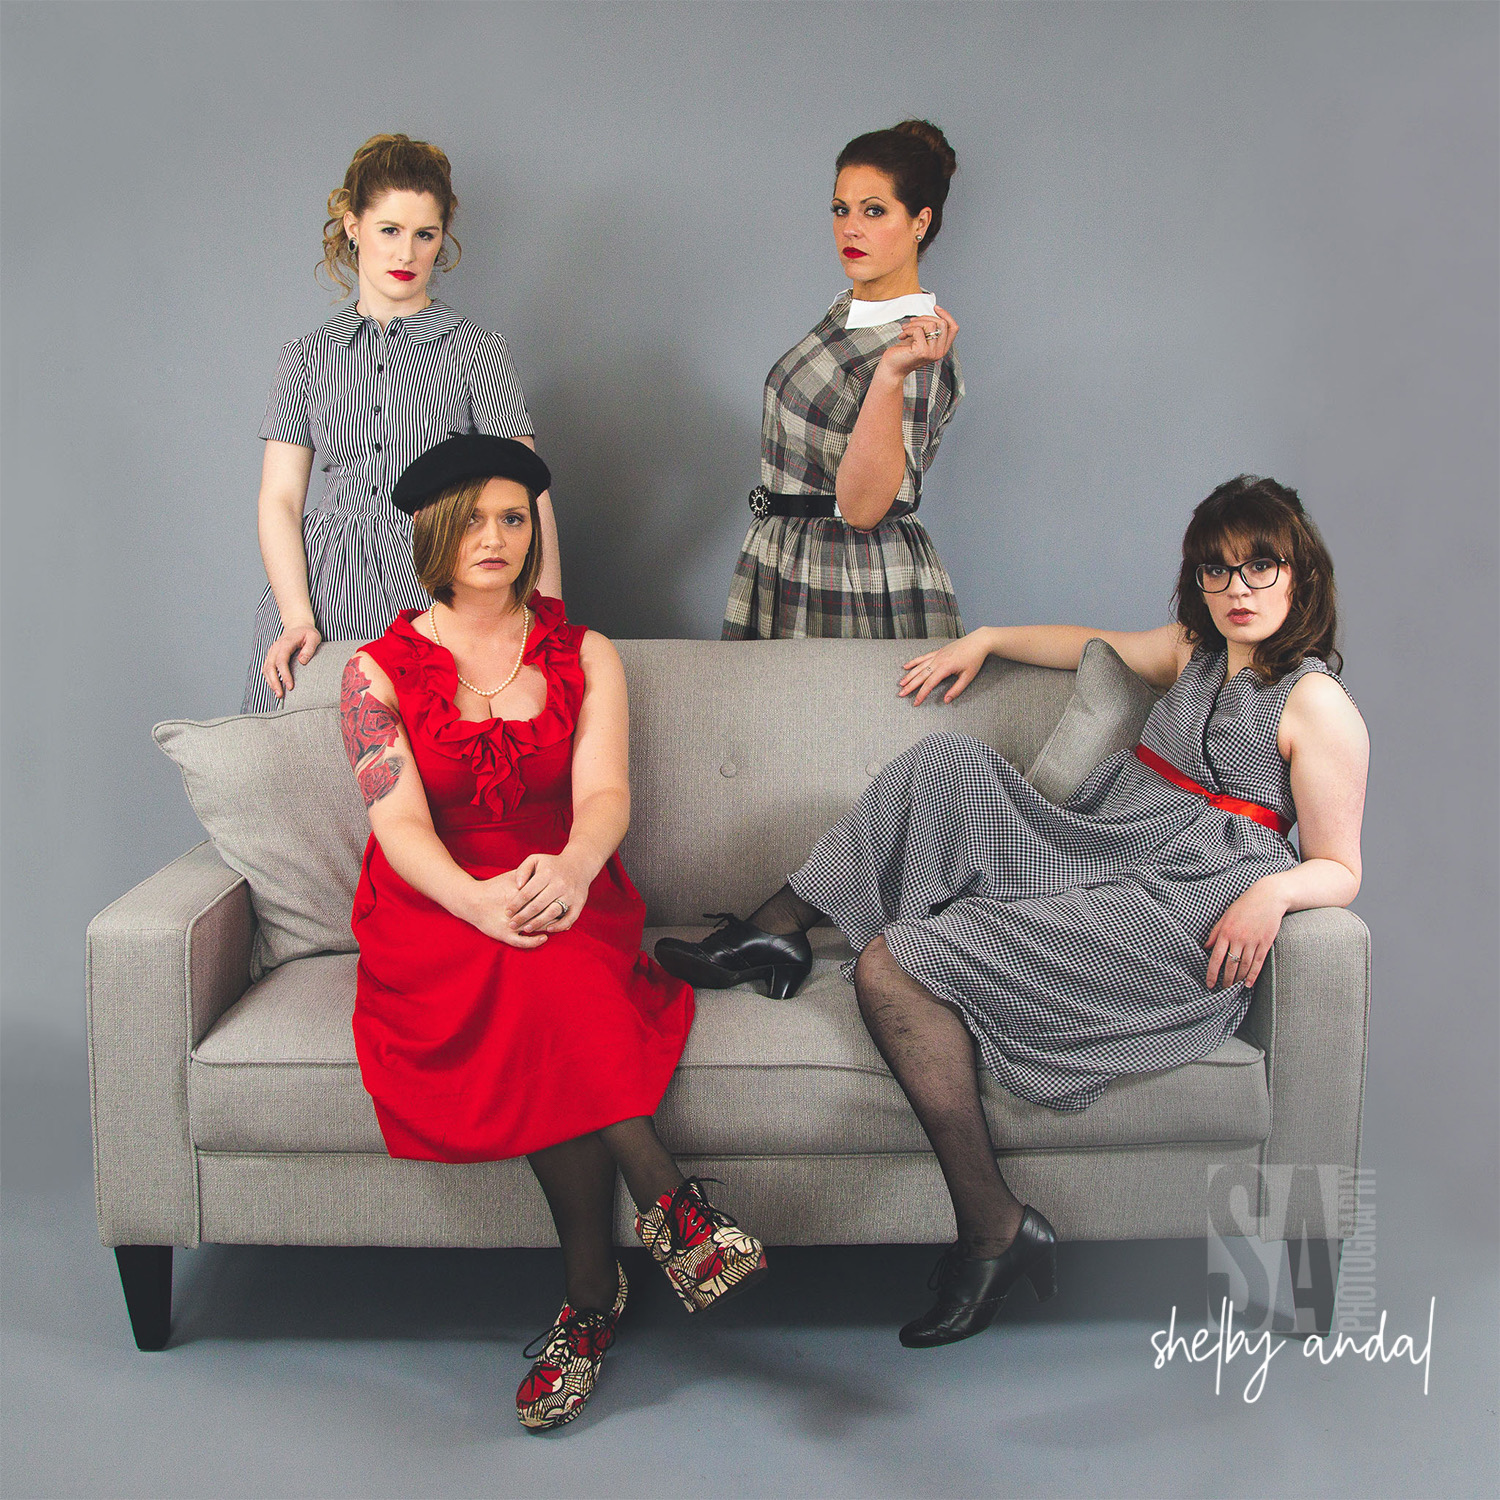
March was so much fun. We had such a great group of ladies this time, and Shelby really knows how to bring out the best in everyone. I had a great time working with Chelsea, Julie, Kaitlin, and Jeralyn, and I love how they looked in all my garments. Each one brought something different and new to the session and was an absolute joy to work with. March has been a great experience.

All photo credits to Shelby Andal Photography
this has been such a fun group

With each month that goes by I am in Awe of the response we are getting. I had no idea what to expect going in to this. I just had a ton of vintage patterns that I wanted to sew, and Shelby comes along with all her magic making this an amazing adventure. And here we are, three months in and so many more amazing and fun patterns and ideas in plan for the rest of the year. I can't say enough about how grateful I am to have such amazing supportive friends that want to go on this journey with me. Without Shelby, and all these fun women I would just be a lady sewing at her kitchen table and posting some not so great (i know what I'm about) pics on her Instagram of her dress form rocking the finished looks. It's thanks to Shelby  Andal Photography, and all the ladies this month, the past two, and the ones to come that bring my Vintage Pattern  project to life. I am feeling beyond blessed!

Jeralyn, such a cutie

Julie that red looks so great on you

Kaitlyn so sweet! And wearing my favorite dress

Chelsea rocking that Plaid dress!!!

Week 12 The Red Dress

Week 12's pattern Simplicity 9025 from 1970 is one I have had for so long. It's one of the first vintgae patterns I ever bought. I got this from a local antique store my senor year of High School, and have never made it. It's one of those that I pull out from time to time, but I always end up going with something else. I can't believe it has taken me so long! This pattern sized 14 bust 36, and I went with view 3. I chose a cherry red mid weight knit that I have also been hanging on to waiting for the right project. I got to admit that I am a little aggravated at myself for not doing this one sooner. It turned out to be a really great pattern to work with.
View 3 in cherry knit
For this dress I tried to stay as true to the pattern as I could with the only changes being the bodice lining (what's new) and the trim on the front of the dress. The pattern consisted of 4 main pattern pieces, a lining piece for the front neck, back neck, and arm opening, and a guide for the trim. Now for the changes,  I just made an all in one lining for the front, and one for the back. As far as the trim goes, they recommended a lace or other pre-made ruffle trim. I decide to make the ruffle out of the same material as the dress. I love the contrast that the picture has with the back dress and white trim, but I worried that white on red would look a bit to Mrs. Claus. Also I wasn't feeling black trim, and matching reds is hard work. There is nothing wrong with the measurements they provide I just wanted a fuller ruffle so I made my cut wider and about 5 inches longer. I surged the ends and did a gather stitch down the center, then I used the guide marking the pattern piece provided. If I had to pick an issue with this one that was the step that gave me the most trouble. Only because I am picky and spent way too long placing the ruffles just so. I also omitted the button detail that they suggested for the center of the ruffles because I felt it took away from my dress. I put in the zipper closer in the back of this dress, but with it being knit I could have skipped that step. I would have if the fabric didn't have the nice weight and lay that is does. 

I was pleased with the finished look of this one, and other that the cloak, this dress has had the most attention of any of my other weeks. I can see myself doing this one again in other colors and fabrics, I think this pattern has a lot of diversity to it and could be one of those that looks so different depending on your fabric choice. Though, I do not anticipate sewing those sleeves anytime soon

Sewn up in all her glory

Tuesday, April 2, 2019

Week 11 Black and White Shirt Dress

What can I say, I LOVE a shirt dress. It has to be one of the most flattering dress styles out there, and this pattern does not disappoint. For week 11 I went with Simplicity 6833 size 12 bust 32 from 1966. I use a very thin stripe black and white cotton from Hobby Lobby and I like the Tim Burtonish feel it has. The dress fits like a modern size small, but would be very easy to re-size to fit just about anyone. This pattern had so many different variations. There are straight and full skirts, long and short sleeves, and pleats or no pleats on the bodice. Because the fabric was already so busy I decided to do the flat panel bodice, and (my favorite) a full skirt style. All views feature a collar, and I went with 3 because I liked the shorter sleeve and the cuff. 
View three and the striped fabric
My goodness this is an easy pattern. I found the instructions very clear and easy to follow. It is a very basic pattern if you choose one of the options with out the pleats. I cant imagine any issues that could arise with that option either unless there was some sort of misprint. I followed the instructions on all steps except for the front gap on the skirt and the neck lining in the back. I made the incision shorter than recommended by about 3 or 4 inches, and I think it made the skirt lay better. I also added a large hook and eye closer (not pictured) at the waist seam line and a snap on the skirt opening to help with gaping.  I feel like I could have even gone a bit father down with it, but it's fine where I stopped. 
Blue pin mark of the patterns guide
and bias taped opening of where I stopped.
Ignore the unfinished seam at the waist line.
The other change I made was the neck facing. I did the one on the front of the bodice because it was all one piece that was folded over to be the backing for the buttons and button holes, and you want to have plenty of support there. But, for the back I didn't think it was necessary. I did a bias tape binding on the collar so that would have just been added bulk to the neck seam, and could potential keep it from laying neatly. Also, it was just one extra step that I didn't see the point in.
Bias binding on neck 
Inside view of front bodice
I really liked this pattern. I love how great it came together, and the look of the finished dress. Its a great shirt dress pattern, and an easy enough one that I would recommend to just about anyone. I want to make this again with a less busy fabric so I can do the pleated version. 
One of my favorite patterns so far!


Monday, April 1, 2019

Week 10 THE CLOAK!!!

Oh My GOODNESS! I'm in love with this cloak. It is probably the most favorite thing I have ever made. Not just in this project, but of all the things I have EVER sewn. It turned out beautifully. If you ever come across this pattern GET IT. I Just love it so much.

Week 10 is McCall's 9550 size 9 bust 32 from 1968. Even though the pattern is sized at a 9, (which is the equivalent of a modern size xxs) I think it will fit up to a modern size med. The issue is the shoulder span, but other than that it's forgiving.  I sewed my to the size pattern listed, but this is one of those patterns that adjusting and sizing up or down would be incredibly easy to do. The only spot that the fit actually matters is in the shoulders. For the fabric I went with a cherry red wool blend coating that I ordered off fabric.com for the outer shell, and black and white gingham cotton for the lining.
pattern and outer shell fabric
I cut the pattern according to the instructions, but I added the liner because I liked having the contrasting colors. This pattern was so easy to make, but it called for a lot of fabric. I used 3 yards of the red and 3 yards of the gingham. As far as the assembling goes this couldn't be more straight forward. It was so easy to put together, even with my alterations. and the finished product turned out so great. I plan on making this again in other colors, cause its just too cute.
I love the bright cherry so much
view of contrasting fabric 


Sunday, March 31, 2019

Week 9 Grey and Red Plaid

For week 9 I went with the Simplicity pattern 4561 from the early 1960's. There is no copyright date on the envelope so I don't have a  exact year. I've ran across these with other Simplicity patterns from this time period. The pattern is a size 20 with a 40" bust. For the fabric I chose a grey and red plaid shirting that I have had in my stash for years. I was given about six yards of it from one of my Aunts, and this is the second dress I have made with it. The first being for me. I love this fabric. It has a great weight and lays beautifully. I felt like it was the perfect choice for this pattern.
Pattern and plaid
As far as the pattern itself, I wasn't crazy about it. I went with view 2. While it made up easily enough, I did do a few tweaks to it. For the main pattern pieces (the bodice and skirt) I followed the instructions. The top is a kimono sleeve, and I turned up the end to make the cuff.  The skirt is a full gathered, and there dress has a zipper in the back. Kimono sleeves are not my favorite, but they added to the overall look of the dress. The finished dress is simple, with clean lines, and easy to follow pattern  instructions. 

cut pieces ready to assemble
Now, for the changes. I made two significant ones. First, the collar on this dress is a detachable one, and honestly I hate that. I decided to attach the collar by sandwiching it between the layers of the bodice and the lining. I clipped the curve and blinded stitched down the lining. The second was the split in the front of the bodice. At first I sewed it up the was it is intended but after trying it on my dress form I realized that it was way too short and just looked odd. I opened up the seams, and made it lower into the bust. I think it made it look so much nicer. 

All that being said this was a pretty easy dress to sew and very flattering on. I wouldn't recommend this to a beginners, but it wouldn't be a challenge for someone with some experience with dresses.
The finished view


Tuesday, February 26, 2019

Feburary Photograpy Session

This photo session! These girls! The dresses! That PINK backdrop!!!! I mean, come on. I can't get over how amazing everything looked this month. It all came together beautifully, and we had the best time on this session. I could not have asked for a better group of gals. And as always Shelby Andal brought her A game. If you would like to read about her experience check it out here: https://shelbyandal.com/2019/02/27/february/

Photo credits: Shelby Andal Photography
Such a great group of gals
A lot went into the planning of this session. I had an ideas of which patterns I wanted, and the fabric I planned to use. Shelby and I sat down and talked about each pattern, picked our models, and the look we wanted to present. She picked out this pink background paper, and oh my goodness it looks so great. It really made the colors pop, and the black really stands out.

We knew we wanted to work with teens this month because of the fun party feel that the dresses have. With the exception on the pink floral dress, they are all  from the 1960's. I knew when it came to hair and makeup I wanted to pay homage to the time period. I tired to give each girl a look that complimented  her, and would fit with the style of each dress. I am so pleased with the finished looks.

Hannah rocking the mod look

One of my all time favorite dresses
Love this color for Ava! 
Looking fierce in purple and pink

Sweet Leila. So pretty

This whole look is stunning

Annalee this pink dress was meant for you!

Those pigtails. Love it
Look at these dolls.


Friday, February 22, 2019

Week 8 Pink and Purple Flowers

For week 8 I wanted to do one of my patterns that is more size inclusive. Simplicity 8889 from 1970 size 24 1/2 bust 47 fits like a modern women's  2x. I love this pattern. I got this at Goodwill so long ago. It even still has the sticker on the front. Its a great basic princess dress, and would look good in a variety of different fabrics. I chose to work with crape back satin in fuchsia pink with purple and white flowers. I love bold prints, and I find that a lot of "plus sized" dresses shy away from them. So when I decide on this pattern I knew I wanted something colorful and fun.
View 1 in pink
For this dress I did a few alterations to it. I knew the girl that would be modeling this one this month. She is fun and I knew she wouldn't shy away from a bold dress. I made the dress according to the pattern, and then altered it to fit her body. This meant taking it in about 4 inches to get the best fit.  I followed the directions as they were printed with the exception of changing the lining to encompass more of the bodice area. I also altered the sleeves to be 3/4" length because it was more flattering on.
Lining on the front of dress
I have to say that this dress pattern is great for if you want to make one quickly. It only takes a few hours to finish, and depending on the fabric you chose could be anything from a simple day dress to fun party dress. If you ever come across this one I recommend adding it to your collection.

Thursday, February 21, 2019

Week 7 Pink Party

Full disclosure, I have made this dress before. Like a lot. It use to be one of my go to patterns before I had children. I bought this one at a local thrift store while I was in high school. I have made this dress for personal use, for friends, and for stage with the local Theatre group. It's a good one. Simplicity 4491 from 1962 size 11 bust 31 1/2". I know it might seem a cheat to do a pattern that I'm so familiar with, but I love this one so much. Plus it's just so pretty that I couldn't imagine doing this project with out it.
She's been well loved
This pattern is so easy. It features 4 main body pattern pieces, one sleeve option, and neck, back,and arm lining patterns. At some point in time I have misplaced the sleeve pattern, so that's disappointing. There is always the possibility that it has been mixed in with another pattern, so MAYBE I will come across it again. When I make this dress I always do a fully lined bodice. I tend to use lighter weight fabrics with this one so it just works out better that way. This time since I'm using a netting I did a lining piece and facings too I start by cutting the bodice pieces out of both main and lining fabrics. I sew the front bodice to the back on both fabrics at the shoulders. Then with right sides together I line up both sections and stitch together at the neck and arms. Next I turn it right side out(wrong sides together) and sew the darts in the front, bust, and back. Lastly I sew thee side seams and set it aside. 
Inside view of bodice lining and darts

Next I move on to the skirt. This is a simple gathered skirt with a pleated panel in the front. I just followed the pleat line of the front panel. Then I gathered the two back panels, and stitched them to the front. I attached the skirt to the bodice making sure to line up the side seams. At this point all that is left to do is add the zipper. Here you want to make sure that you leave a enough of the center back ungathered so it will be easier to attach the zipper. I find that it makes it harder to zip if the fabric is thicker in any given spot. 
The finished dress
I added a petticoat underneath to make the skirt fuller, and I think it added so much to the finished look. I love the bright pink, and how fun and playful this party dress turned out. 
Peekaboo Petticoat


Wednesday, February 20, 2019

Week 6 Sequins

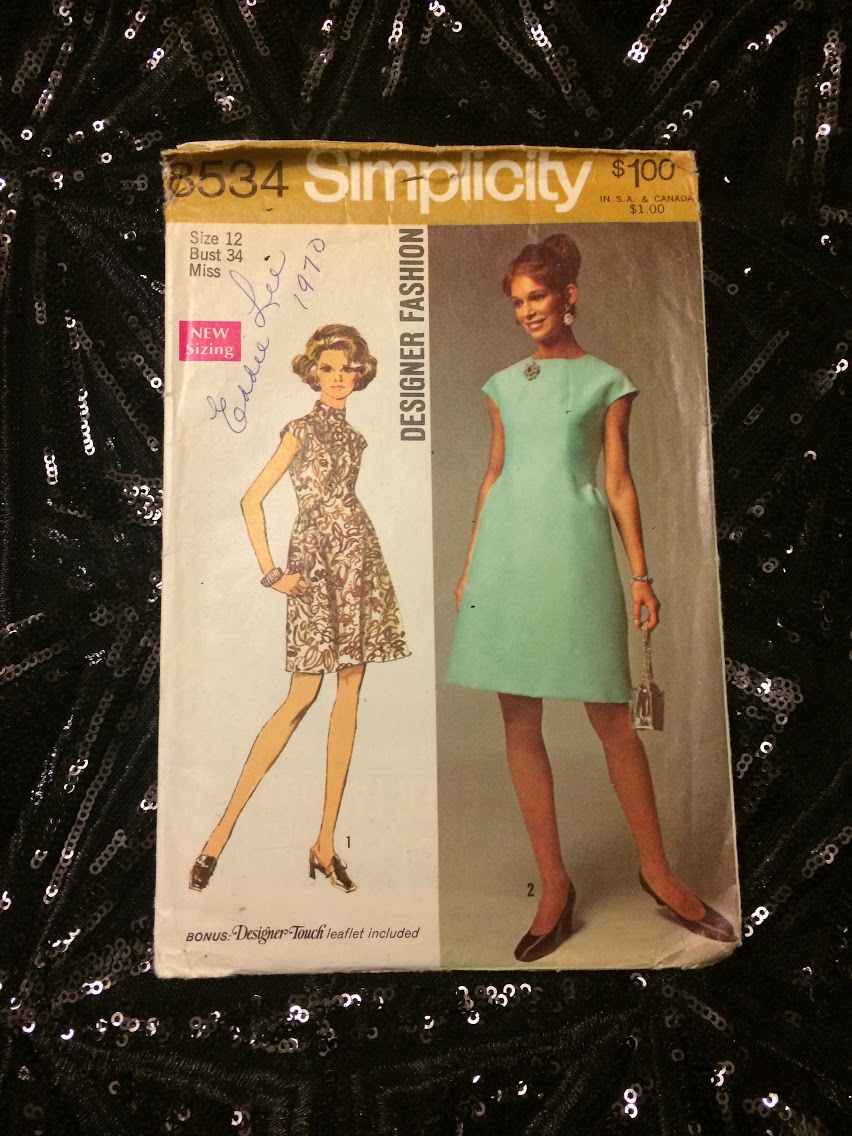
This Pattern! It has to be one of my absolute favorite. Simplicity 8534 from 1969 size 12 bust 34 fits like a modern size medium. It was such a simple pattern to follow and it looked so good when it was all finished. I found the instructions to be clear and concise. The pattern is labeled as a "designer fashion" has 4 main pattern pieces, 3 lining pieces, and POCKETS! I love pockets in a dress . They make it so much more appealing. I made this dress using 1/2 a yard of crape back satin in black and a remnant of black sequin material.

Because I used a sheer embellished fabric, (and I like to make my life harder) I needed to fully line the dress. I used a yard of black dressing lining and cut all the main pattern pieces out of it. I cut the front panel and skirt back from the sequin, and the front side and back panels from the satin. I was basically making two complete dresses and joining them together at the neck, sleeves and the back seam. I started by sewing up the outside shell of the dress. I attached the front panel/skirt to the side panels, and then gathering the skirt back, stitched to the back upper panels. I left the sides and back open to make attaching the liner easier. Next, I sewed the lining the same way, and with right sides together I attached them at the neck and arms. I then pulled it right side out, and sewing up the sides. I attached the zipper, sewed up the back, and hemmed the dress. 

I'm a big fan of this pattern. It is easy, quick to sew, and turns out exactly like its pictured. While i don't think it its versatile enough to use just any fabric, with the right one it makes a great party dress.  

Tuesday, February 12, 2019

Week 5 Poodles and Velvet

This week was a simple one, and thank goodness. I picked McCall's 2630 from 1970 I chose a grey chiffon with flocked poodles, and a black velvet to use. The pattern consisted of 5 main pattern pieces, and the instructions were simple and straight forward. It is a size 12 with a 34" bust that fits like a modern small/medium. I found this pattern at a local antique store and it only cost me .50 cents. It was part of a pick 10 for $5 box. The poodle fabric I've had for a couple years, and I picked up the black from Joann's. 
size 12
34"bust
I went with view B for this one, because I wanted to do the short sleeves. Honestly, I could have gone for all three versions of this one.  I love the waistline on this pattern. How it comes to a v and has slight gathering across the sides and back would look flattering on so many body types.

As far as construction goes, this one was simple. It would make a good option for somebody that was just starting out, or looking for a quick day project. It came together quickly and easily. For my version I shortened the skirt slightly and changed the lining/ facings for the bodice. I did run into the same common problem of ends not lining up properly. As always it's an easy fix, and didn't hinder the look of the final project.  Since I made the skirt of the dress in a chiffon I needed to add a lining. I used a silver satin and hemmed it about 2 inches shorter that the poodles. I added an invisible zipper in back.
uneven edges of front and back panels of the bodice 

All done!
I loved the look of the finished project, but I think I may do this one again as the long sleeve version. I can see this becoming one of my go to patterns. It was just too easy, and fun to sew. 

Friday, February 1, 2019

Photo Shoot Day!!!

OH MY GOODNESS! What an incredible day I had on the photo shoot with Shelby Andal Photography. It's always fun to work together. I wasn't sure what to expect with our January session, but it went better than I could have ever imagined. Shelby was on point! Her vision was great, and she has this bubbly personality that just makes people respond to her. Our models were PHENOMENAL, and such a joy to be around. They were so excited to be there, and their personalities meshed so well together. I think it really shows in the photos.

Towards end of last year I meet up with Shelby for lunch. During the visit we got into a discussion of projects for the new year. Shelby is such a creative person, and is always growing and evolving her photography business. I'm in awe of her talent. While on the subject I told her of my vintage pattern project, and she was IN. Shelby put out an official model call on her blog and social media accounts, and the response was overwhelming in the best way. We knew then that we were in for an adventure Over the next few months we talked ideas for my patterns and vision for her photography sessions. We planned a specific look for each month some involving themes, some just based on the color of the garments.

For January my main colors were burgundy and brown. I knew that since this was our "trial run" we would focus on color more that any sort of theme. We sat down and went through all our applicants and choose three ladies that we thought would look great together an fit the dresses the best. Rheanne, April, and Pamela were the perfect models for my dresses. It was like the dresses were tailor made for their shapes. I went in to the fitting fully prepared to need adjustments, but it all look so great on them. The best part was when one would walk out and we just knew that THAT dress was meant for her. To go along with the dresses I supplied them with vintage jewelry from my personal collection and some of my favorite shoes. I also did the hair and make up. Shelby chose an almond colored backdrop, worked her magic, and it all came together beautifully.


Photo credit: Shelby Andal Photography


Rheanne in the Plaid Flannel Dress and Pinstriped Jacket


Pamela KILLING it in that hat

April and the sass

So much FUN with these ladies!

April In the Dachshund Dress

Stunning 

One of my favorite shots 

Pamela in the Floral Corduroy 

Wednesday, January 30, 2019

Week 4 Cropped Jacket


So, I went rouge this week. I had decide to go easy on myself, and then completely didn't.  I picked the Simplicity pattern 6099 from 1965.  I chose to just do the jacket on this one. I liked the dress, but the scalloped edge collar was calling my name. I went with a pinstriped navy suiting that I have had in my stash for a while. I got it from Sir's Fabric. This used to be my go to fabric store before it burned down a couple years ago. I'm still not over the loss. I also picked this burgundy crest fabric. This was given to me by a friend that was cleaning out her house. The original pattern was only faced at the neck, and front facing making it a simple and straight forward pattern. I prefer a fully lined jacket, and making my life harder. So I skipped the instructions and just did my own thing. 
 
Pattern, pinstriped outer, and burgundy crest lining


For this pattern I used all the pattern pieces except the neck facings. First I cut out the front and back panels and sleeves from both fabrics. Next, using only the pinstripe and interfacing I cut out the collar, and stitched it making sure to clip the curves so it would lay nicely. I cut out the front facing making sure to add about an inch for a seam allowance. I stitched all the dart lines on both fabrics, and set the pinstriped aside. for the lining I laid the facing pattern over the lining fabric and cut that away. I then pinned the navy facing to the burgundy lining and stitched.
Lining fabric pinned to facing fabric

inside of the finished jacket
Next, I moved on the the sleeves. This was the same basic idea as the lining. I cut the sleeves from both materials. I made the lining about an inch shorter so it will incorporate the navy into the seam line  when the sleeve is turned out. This lets the seam be hidden inside the arm. It just gives the finished garment a cleaner look.
lining pinned at the wrist

sleeve pinned and ready for stitching

view of the outside and inside of the left arm

After the sleeves were done I was ready to assemble the jacket. I sewed together the outer shell, and the lining. I then attached the sleeves to their corresponding fabric. I sandwiched the collar between the lining and outer shell fabrics with the right sides together. Now all I had to do was sew it up. I did this as if i was sewing a lined purse, by leaving an opening in the lining to pull it through. Once it was right side out I hand stitched the opening closed, pressed the jacket, and added a button and button hole instead of the tie closer the original pattern calls for. 
hole in the lining I turned the jacket out through


all said and done
I have to admit that even though my version was a lot more work I love how it turned out. This is a pattern I can see myself using again.  I think it would look so great in a brighter color or floral print. But that's a project for another day.


March Vintage Pattern Project

March was so much fun. We had such a great group of ladies this time, and Shelby really knows how to bring out the best in everyone. I had a...